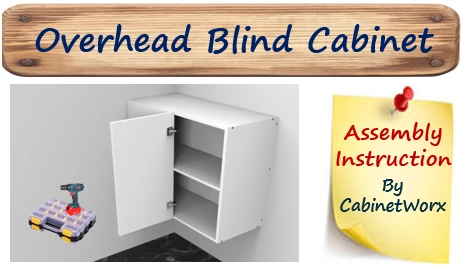
Top Blind Cabinet Assembly Instructions - Professional DIY Corner Wall Cabinet Guide:
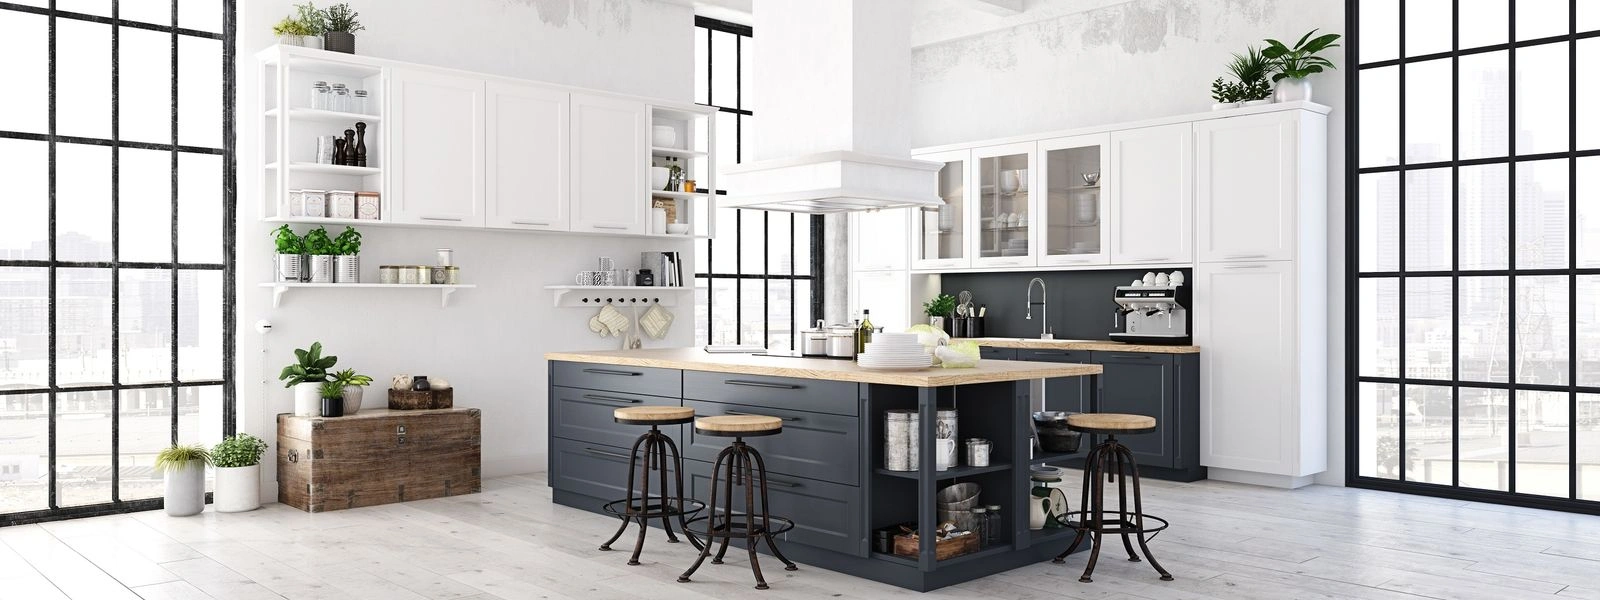
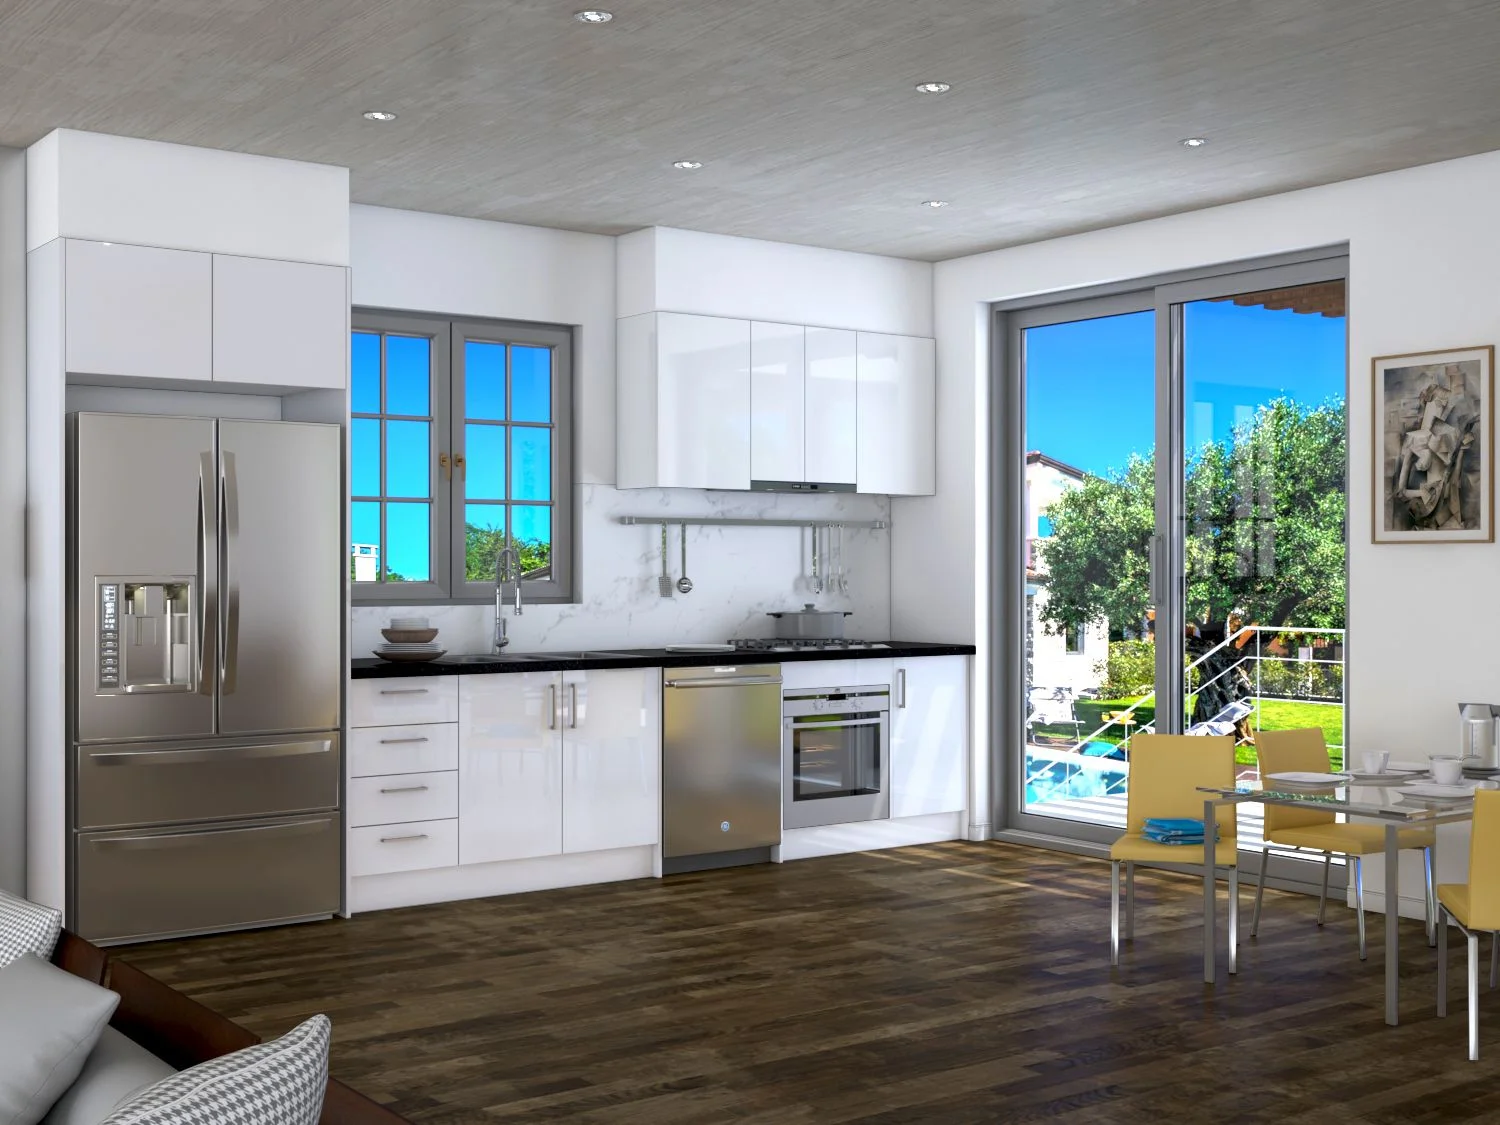
Welcome to your comprehensive assembly guide for CabinetWorX flatpack top blind cabinets. This specialized corner wall cabinet solution is designed to maximize upper kitchen storage in corner spaces, providing you with an efficient and professional-quality installation that transforms awkward corner wall areas into accessible storage.
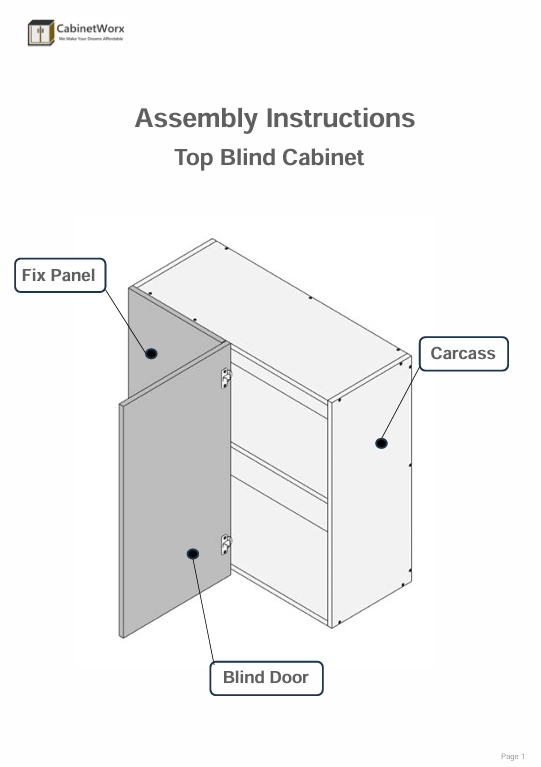
Understanding Your Top Blind Cabinet:
A top blind cabinet is specifically engineered for corner wall installations, featuring a unique design with a blind panel configuration that allows seamless integration into L-shaped kitchen layouts at upper levels. This cabinet includes a main carcass structure with top and bottom panels, adjustable shelving, a fix panel for hinge mounting, and a door that provides accessible wall storage while maintaining clean sightlines in your kitchen design.
Workspace Requirements:
Before beginning assembly, ensure you have adequate workspace for this project. You'll need a clean, flat surface at least 1.5 meters square to lay out all components comfortably. A carpeted area or protective covering is recommended to prevent scratching the cabinet panels during construction. Wall cabinet assembly requires careful handling of panels, so clear a working area that allows you to move freely around all sides. Having a stable work surface at waist height can make assembly more comfortable and reduce strain.
What Makes These Instructions Easy to Follow:
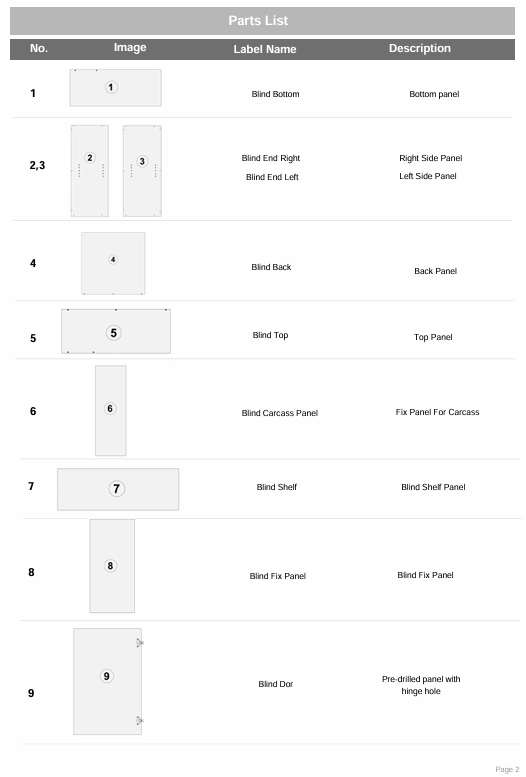
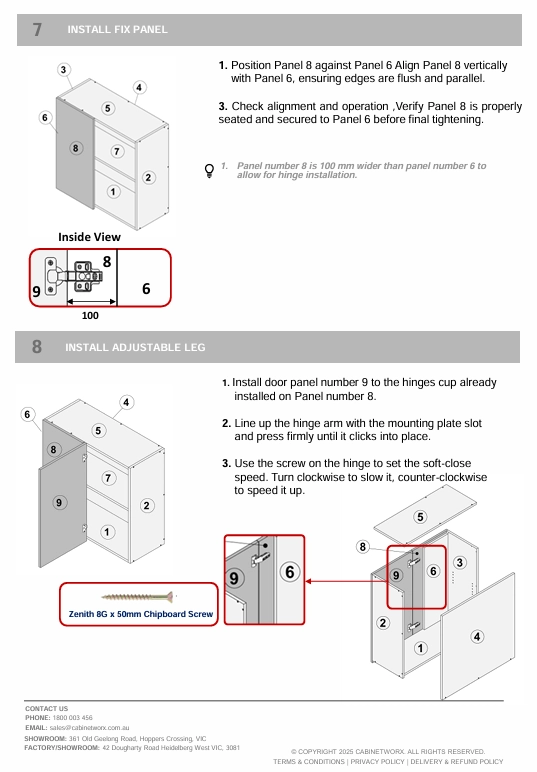
Our detailed step-by-step assembly guide features clear visual diagrams for each stage of construction, numbered component identification, and precise written instructions. Each panel is clearly labeled in the parts list, corresponding directly to the assembly steps. The pre-drilled construction eliminates guesswork, as all holes are precisely positioned for accurate alignment and hinge installation.
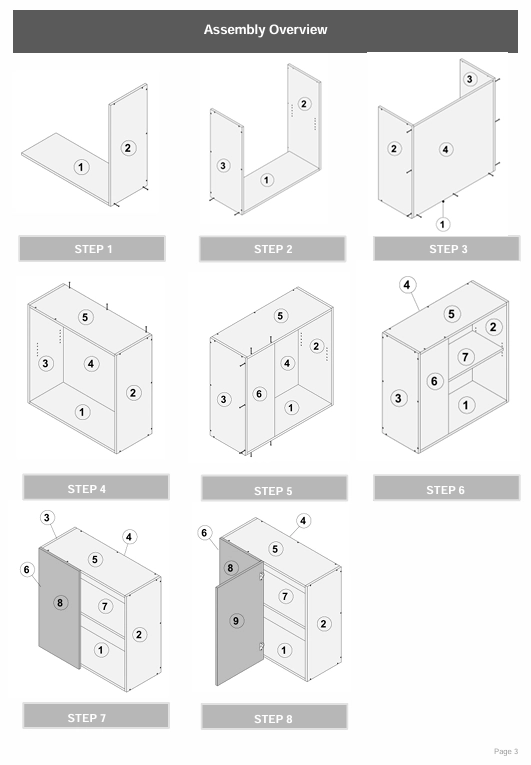
Assembly Process Overview:
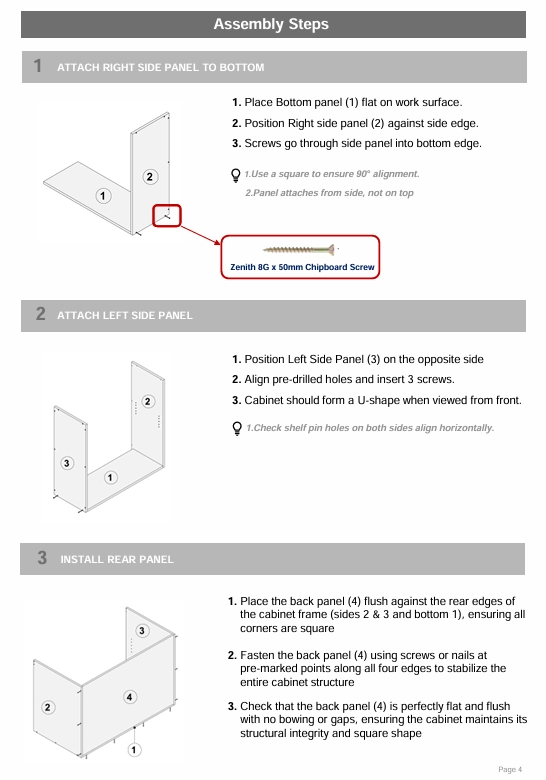
The instructions walk you through eight comprehensive steps, from bottom panel attachment through to final door installation. You'll construct the main carcass box with top and bottom panels, install the blind panels, add the adjustable shelf system, attach the fix panel for door mounting, and complete the assembly with door hinges. Each step includes detailed notes and alignment tips to ensure professional results ready for wall mounting.
These flatpack components arrive in compact packaging for easy transport, with all panels precision-cut and ready for assembly in your Australian home.